Everyone has access to a standard channel, so there's no need to add members. However, here's how you add members to a private or shared channel.
Add members to a private channel
As a private channel owner, you can add or remove members and edit private channel settings. Each person you add must first be a member of the team.
The simplest way to add members of your team to a private channel is to go to the private channel name and select More options > Add members. This opens a menu that lets you search for and add new members, as well as set their roles. Members may now post messages in the private channel.
You can also go to the private channel name and select More options > Manage channel. Then use the Members tab to add or remove members and assign roles. Your private channel can have multiple owners and up to 250 members. The Settings tab lets you choose what members are allowed to do.
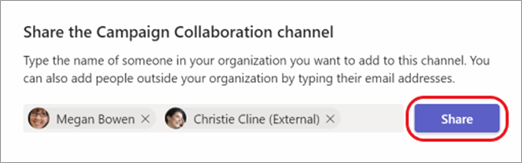
Add members to a shared channel
When creating a shared channel, the default setting is Share this channel with everyone on the team.
- After you've chosen Shared channel as the channel type in the selection box, type the names of the people in your org you want to add to the channel and choose them from the list. To add people outside your org, type their email addresses and choose them from the list. Then select Share.
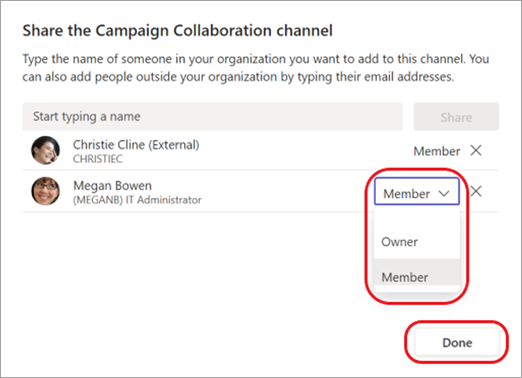
- To change a Member to an Owner, select the down arrow to the right of Member, and choose Owner. Then select Done.
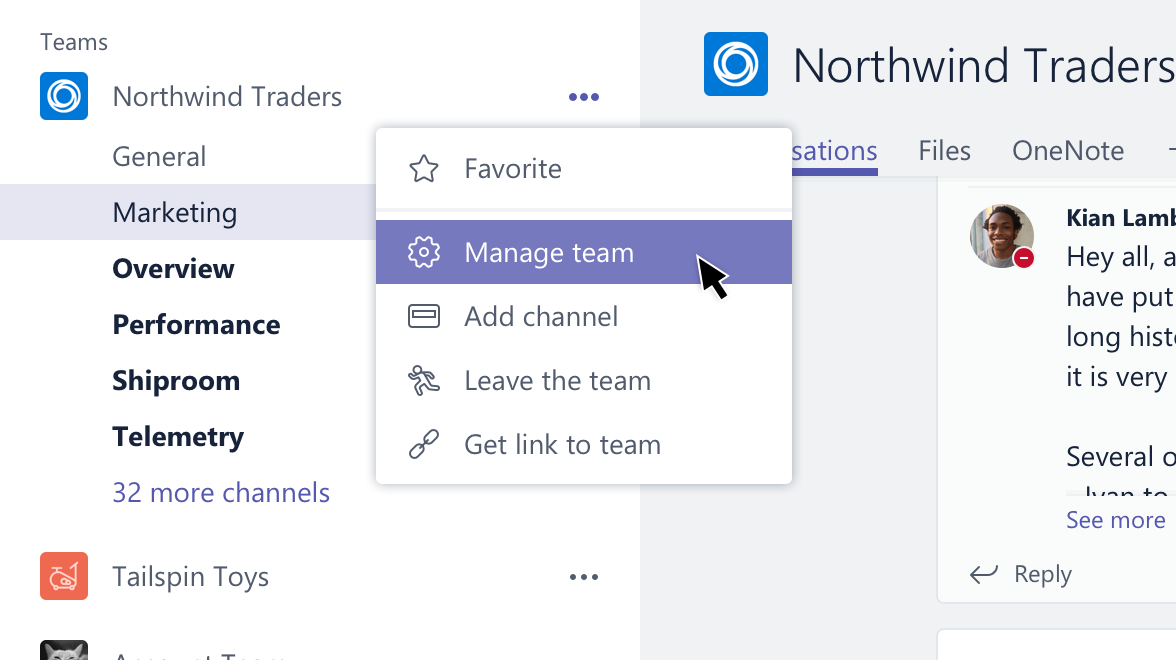
View a member list for a team
To see the member list for a team, go to the team name, and select More options > Manage team. There's a list of members in the Members tab.
Channels are open to the entire team.