Body
Summary
Microsoft Teams has functionality to create Teams and channels with members in the same organization and in this article you will find information that will help you understand how these Teams and channels function.
- How to create a Team
- How to manage your Team
- What roles are available in a Team
- How to add and remove members in your Team
- How to create and manage channels in your Team
- How to add members to a channel
- How to manage existing channels in your Team
- How to edit channel details in your Team
Create a team from scratch:
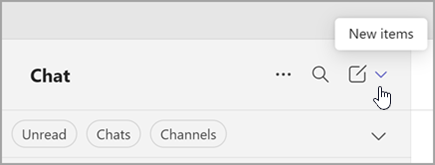
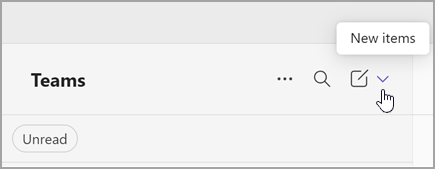
- On the left side of the app, Select Chat. If using the separate view, select Teams.
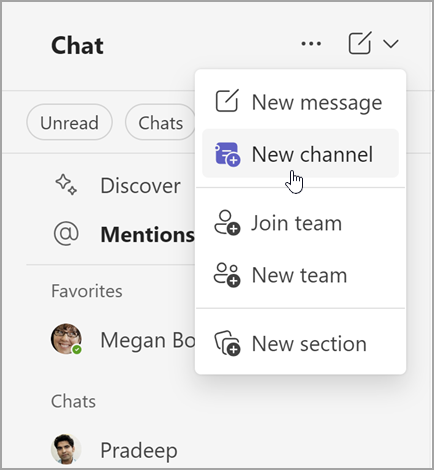
- Select New items from above your list of chats and channels.
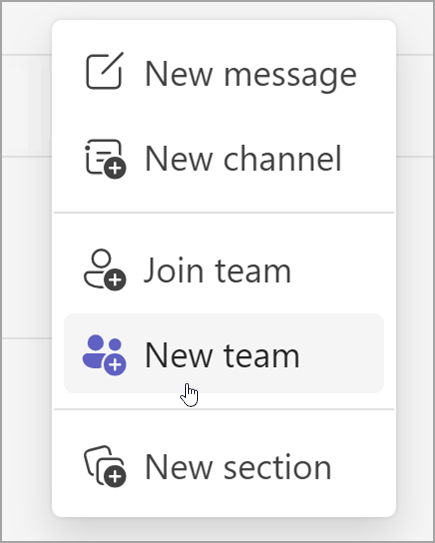
- Select New team.
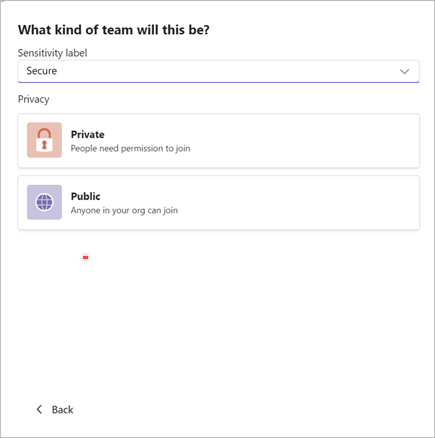
- Name your team and add an optional description.
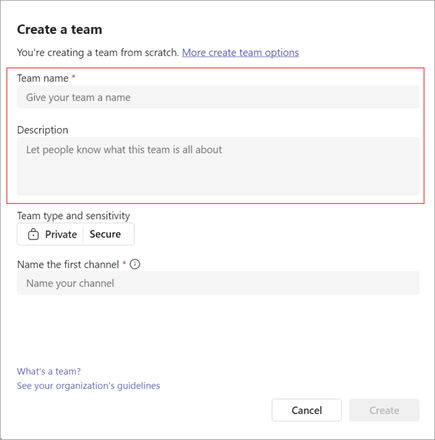
- Decide what kind of team you want this to be. To limit content and talk to a certain group of people, choose Private. For a community or topic that anyone in the org can join, choose Public.
- Name your first channel.
- When you're done, select Create.
If you’re a team owner, you're in control of many settings and permissions for your team.
Change team name, description, and privacy settings
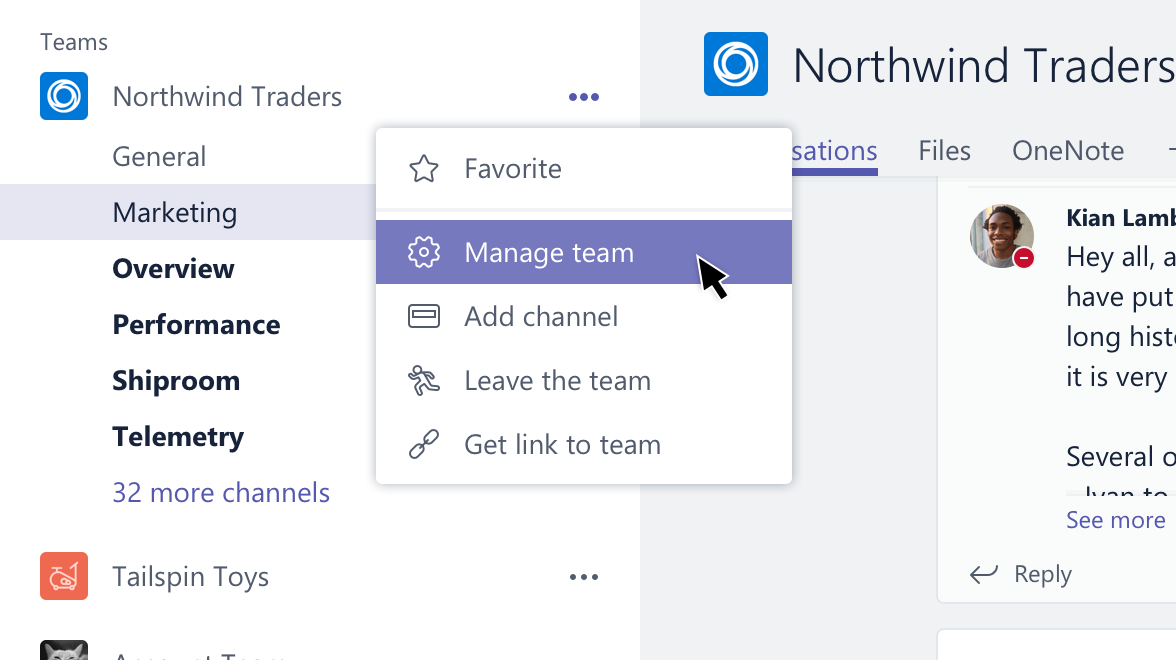
- Go to the team name and select More options > Manage team.
- In the Settings tab, expand the Team details section and select Edit.
- Change the team name, description, or whether it's a public or private team. Select Done.
Change team permissions and other settings
- Go to the team name and select More options > Manage team.
- In the Settings tab, check or uncheck the options or permissions that you want to use.
Back to Top
Every member in Teams has a role, and each one has different permissions.
- Owners
- Team owners manage certain settings for the team. They add and remove members, add guests, change team settings, and handle administrative tasks. There can be multiple owners in a team.
- Members
- Members are the people in the team. They talk with other team members in conversations. They can view and usually upload and change files. They also do the usual sorts of collaboration that the team owners have permitted.
- Guests
- Guests are people from outside of your organization that a team owner invites, such as partners or consultants to join the team. Guests have fewer capabilities than team members or team owners, but there's still a lot they can do.
For a more detailed breakdown of the capabilities for each role please visit: Microsoft's help page
Back to Top
Add members to a team
- Go to the team name and select More options > Add member.
- Start by typing a name, distribution list, security group, or a Microsoft 365 group. You can also add people outside your org as guests by typing in their email addresses.
- When you're done adding members, select Add. You can make someone a team owner by selecting the down arrow next to Member. A team can have multiple owners.
Remove members from a team
If you're a team owner, you can remove someone from your team.
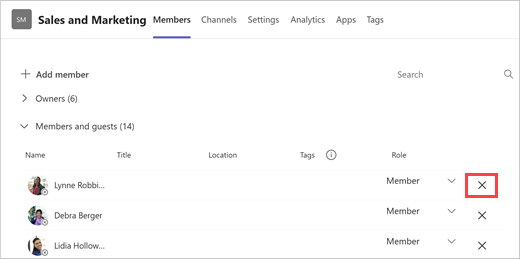
- Next to the team name, select More options > Manage team.
- On the next screen, select Members, then locate the team member under Members and guests.
- Select Remove on the far right of the name of the person you'd like to remove.
To remove another team owner, first change their role from owner to member, then remove them.
After you remove someone from a team, you can always add them back to the team later on by selecting More options > Add member.
Back to Top
Create a channel from Chat or Teams:
- On the left side of the app, select Chats. If using the separate view, select Teams.
- Select New items from the dropdown at top of your list of chats and channels.
- Select New channel.
- Select a team to choose a team to host your channel.
- Fill in some quick details about your channel by choosing a name, entering an optional description, and a channel type. This is where you'll choose to make your channel standard, private, or shared.
Create a channel from a team name:
- Select either See all of your teams or See all your teams and channels to see a list of the teams you belong to.
- Locate the team you'd like to add a channel to.
- To the right of the team name, select More options > Add channel.
- Fill in some quick details about your channel by choosing a name, entering an optional description, and a channel type. This is where you'll choose to make your channel standard, private, or shared.
When you create a new team or private channel in Microsoft Teams, a team site in SharePoint is automatically created. To edit the site description or classification for this team site, go to the corresponding channel’s settings in Microsoft Teams. Learn more about managing Microsoft Teams connected teams sites.
Manage private channel creation
As a team owner, you can turn on or turn off the ability for members to create channels.
- Find the team you want to edit, and select More options.
- Select Settings > Member Permissions.
- Choose whether users can create, update, or delete channels.
Edit, delete, hide, or leave a channel
Once you delete a channel, you also lose its entire conversation history. Channels can be restored within 30 days, but no new channels can be created with the same name as the deleted channel within that 30-day window. The OneNote sections associated with a deleted channel will still show up on your team's SharePoint site.
Select More options next to the channel name. Then use the menu to edit, delete, hide, or leave the channel.
Back to Top
Everyone has access to a standard channel, so there's no need to add members. However, here's how you add members to a private or shared channel.
Add members to a private channel
As a private channel owner, you can add or remove members and edit private channel settings. Each person you add must first be a member of the team.
The simplest way to add members of your team to a private channel is to go to the private channel name and select More options > Add members. This opens a menu that lets you search for and add new members, as well as set their roles. Members may now post messages in the private channel.
You can also go to the private channel name and select More options > Manage channel. Then use the Members tab to add or remove members and assign roles. Your private channel can have multiple owners and up to 250 members. The Settings tab lets you choose what members are allowed to do.
Add members to a shared channel
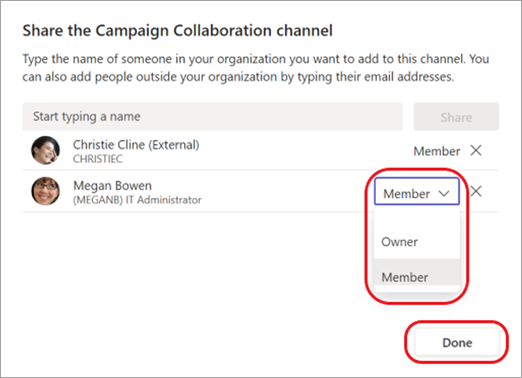
When creating a shared channel, the default setting is Share this channel with everyone on the team.
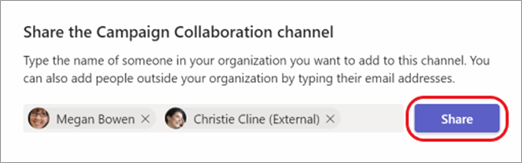
- After you've chosen Shared channel as the channel type in the selection box, type the names of the people in your org you want to add to the channel and choose them from the list. To add people outside your org, type their email addresses and choose them from the list. Then select Share.
- To change a Member to an Owner, select the down arrow to the right of Member, and choose Owner. Then select Done.
View a member list for a team
To see the member list for a team, go to the team name, and select More options > Manage team. There's a list of members in the Members tab.
Channels are open to the entire team.
Back to Top
As a shared channel owner, you can manage owner roles, member roles, channel settings, and more.
Manage channel owners and members
- Go to the shared channel you own, and select More options > Manage channel.
- Select Members.
From there, you can:
- Select a Role for each person. If they’re in your org, you can change a Member to an Owner.
- View the number of Members in a team. Select the number to the right of the team to view the members.
- Remove members or remove teams. Click the X on the right to remove a member or team.
Manage channel settings
- Go to a shared channel you own and select More options > Manage channel.
- Select Settings.
- Expand the options to manage Channel details, Member permissions, @mentions, and Fun stuff.
Delete a shared channel
Go to the shared channel you own and select More options > Delete this channel.
Restore a deleted shared channel
- Go to the host team for the shared channel and select More options > Manage team.
- Select Channels > Deleted.
- Locate the channel you'd like to restore. On it's right, click Restore.
Back to Top
Rename a channel
You can rename a channel to give it a more meaningful name that better reflects its purpose. This can be especially helpful for the default channel that is created with every new team. To rename a channel, follow these steps:
- In the Teams desktop app, navigate to the team that contains the channel you want to rename.
- Point to reveal, then select More options next to the channel you want to rename.
- Select Edit channel.
- Underneath Channel name, enter the new name for the channel. If you're the team owner, you can rename the first-named team to "General." Otherwise, the new name must be unique within the team and cannot contain any of the following characters: / \ : * ? " < > |
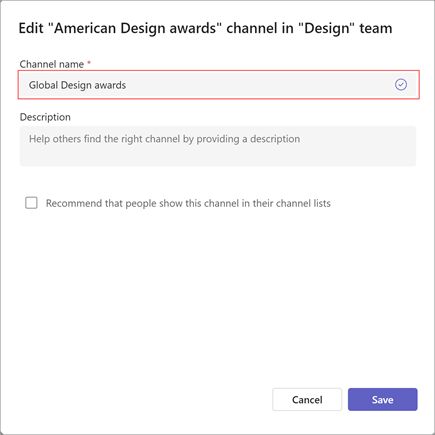
- Select Save to rename the channel.
The renamed channel will be shown in all parts of Teams, including the channel list, search and filter results, and on SharePoint sites and notifications.
Update channel layout
Channel conversations can have two layouts, posts and threads. To change a channel's layout:
- Point at the channel to reveal More options.
- Select More options > Edit channel.
- Select either Threads or Posts under layout.
- Select Save to update the layout.
Update channel description
For channels other than "General,” team owners or team members (with required permissions) can also update the channel description. “General” channels have the same description as their team. Start by navigating to the channel you want to update, then:
- Hover over the channel and select More options > Manage channels.
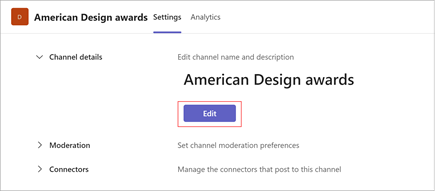
- Go to Settings > Channel details. Then, select Edit under Edit channel name and description.
- Type a new description.
- Select Save to update the description.
Back to Top