Overview
Microsoft Teams allows faculty and staff to collaborate effectively using dedicated teams and channels. This guide covers how to create a team from scratch, manage team settings and membership roles, organize standard, private, and shared channels, and adjust channel details.
Applies to: Faculty Staff
Step-by-Step Guide
Instructions
1 Create a New Team from Scratch
You can create a brand new team to collaborate with a department, committee, or project group.
●On the left sidebar of the Teams app, select Chat (or Teams if using separate view).
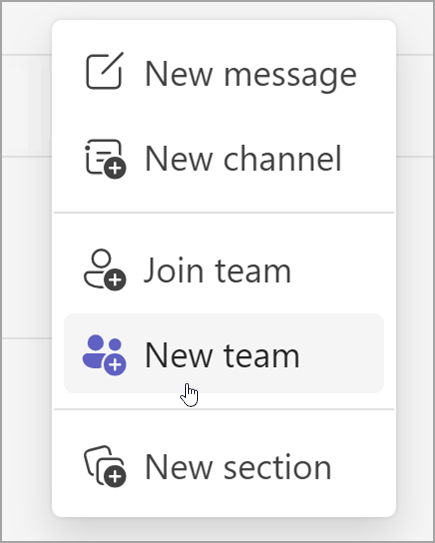
●Select New items above your list and choose New team.
●Name your team, enter an optional description, and select the privacy type (Private for restricted access, or Public for anyone in the organization).
●Name your initial default channel and click Create.
2 Understand Roles and Manage Team Settings
Team owners have full administrative control over settings, permissions, and member roles.
●Owners: Manage settings, add/remove members, invite guests, and handle administrative duties. Multiple owners are permitted.
●Members: Participate in conversations, upload and edit files, and collaborate based on owner permissions.
●Guests: External partners or consultants invited by an owner with targeted capabilities.
●Update Settings: Go to the team name, select More options (…) > Manage team, and use the Settings tab to edit team details, member permissions, guest permissions, @mentions, and fun stuff.
3 Add, Change Roles, or Remove Team Members
Maintain your team roster by adding colleagues or removing former participants.
●Add Members: Click More options (…) > Add member next to the team name, search by name, distribution list, or email address, choose their role, and select Add.
●Change Roles: Go to More options (…) > Manage team > Members, locate the person, and use the dropdown to switch between Owner and Member.
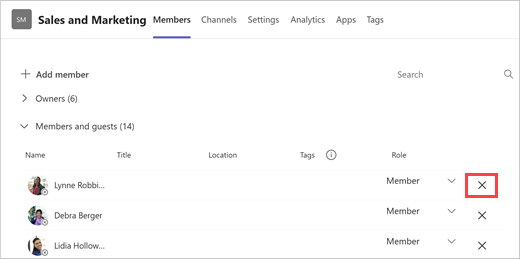
●Remove Members: In the Members tab, click the X next to the person you wish to remove. To remove another owner, change their role to Member first.
4 Create Channels (Standard, Private, and Shared)
Channels help break down team collaboration by topic, project, or department.
●Add a Channel: Select More options (…) > Add channel next to the host team.
●Standard Channels: Accessible to every member of the team automatically.
●Private Channels: Restricted to invited team members only (supports up to 250 members and multiple owners).
●Shared Channels: Collaborates with specific people across multiple teams or external organizations without adding them to the entire host team.
5 Edit Channel Settings, Layouts, and Restore Deleted Channels
Customize channel appearance, rename channels, or recover deleted conversations.
●Rename Channel: Select More options (…) > Edit channel next to the channel, type the new name (cannot contain / \ : * ? " < > |), and click Save.
●Update Layout: Select More options (…) > Edit channel and toggle between Posts or Threads layout.
●Restore Deleted Channel: Go to the host team, select More options (…) > Manage team > Channels > Deleted, find the channel, and click Restore (available within 30 days of deletion).
Important Note on SharePoint Sites & Channel Names
When you create a team or private channel, a connected SharePoint site is automatically provisioned for file storage. If a channel is deleted, its conversation history is removed, but it can be restored within 30 days. You cannot create a new channel with the identical name until that 30-day window has expired.
Support & Assistance
Get Help
Need additional assistance creating or managing Microsoft Teams and channels?